Tuesday, January 5, 2016

But the Collar is so Pretty! (Vogue 8793)


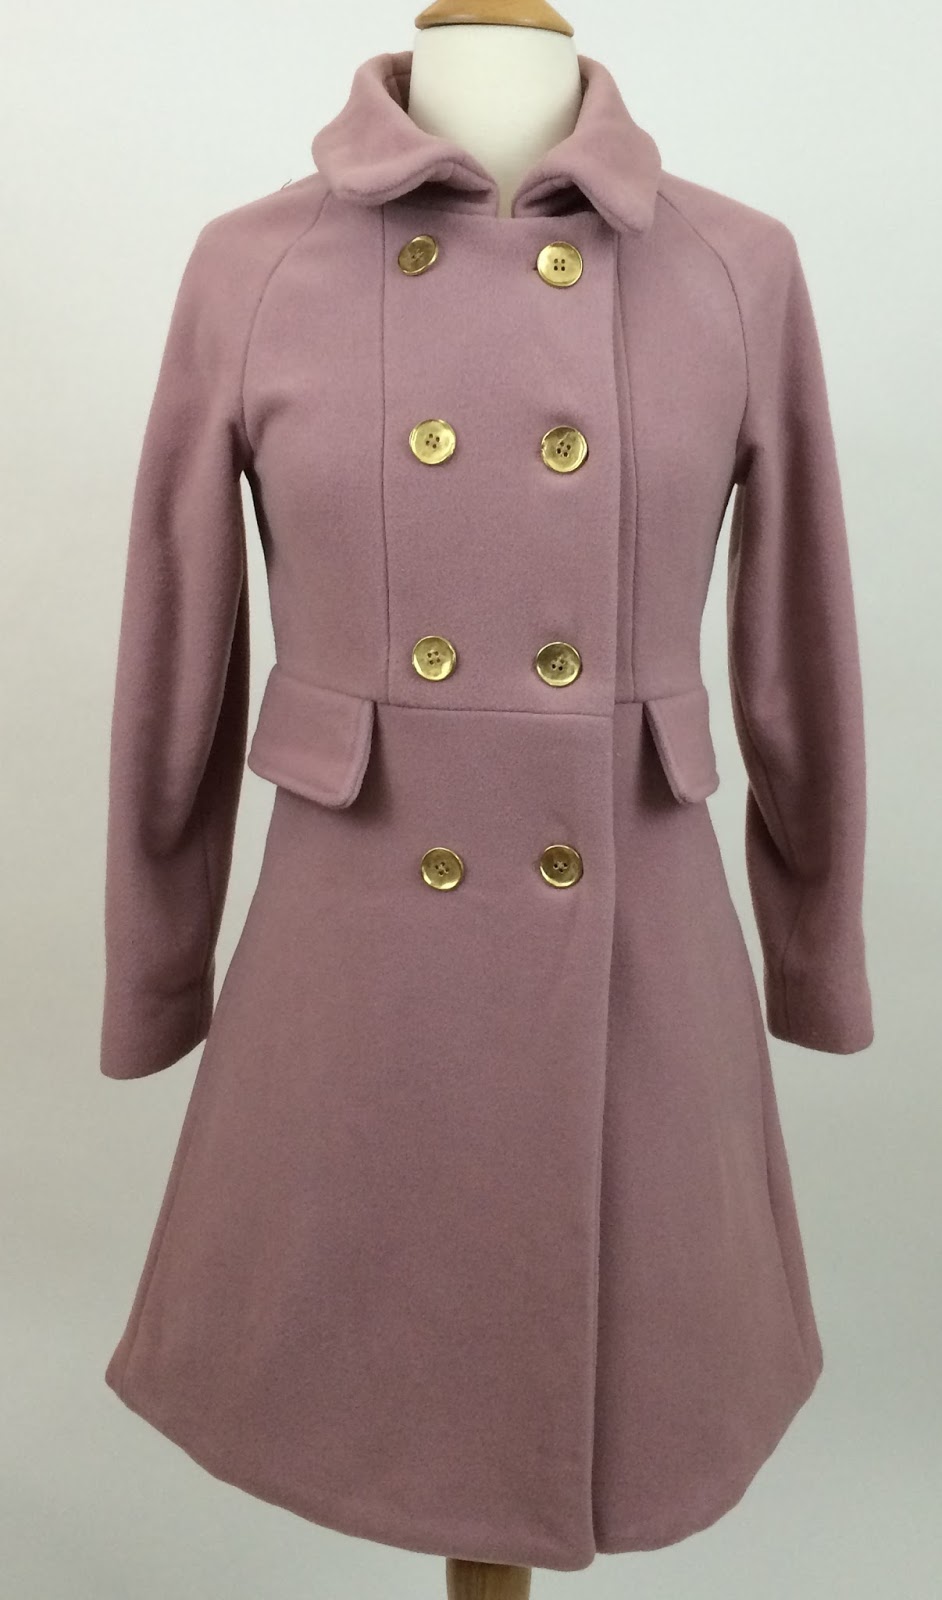
This is my first time trying a pattern designed by Katherine Tilton. I was attracted to the unique double collar embellished with zippers. 


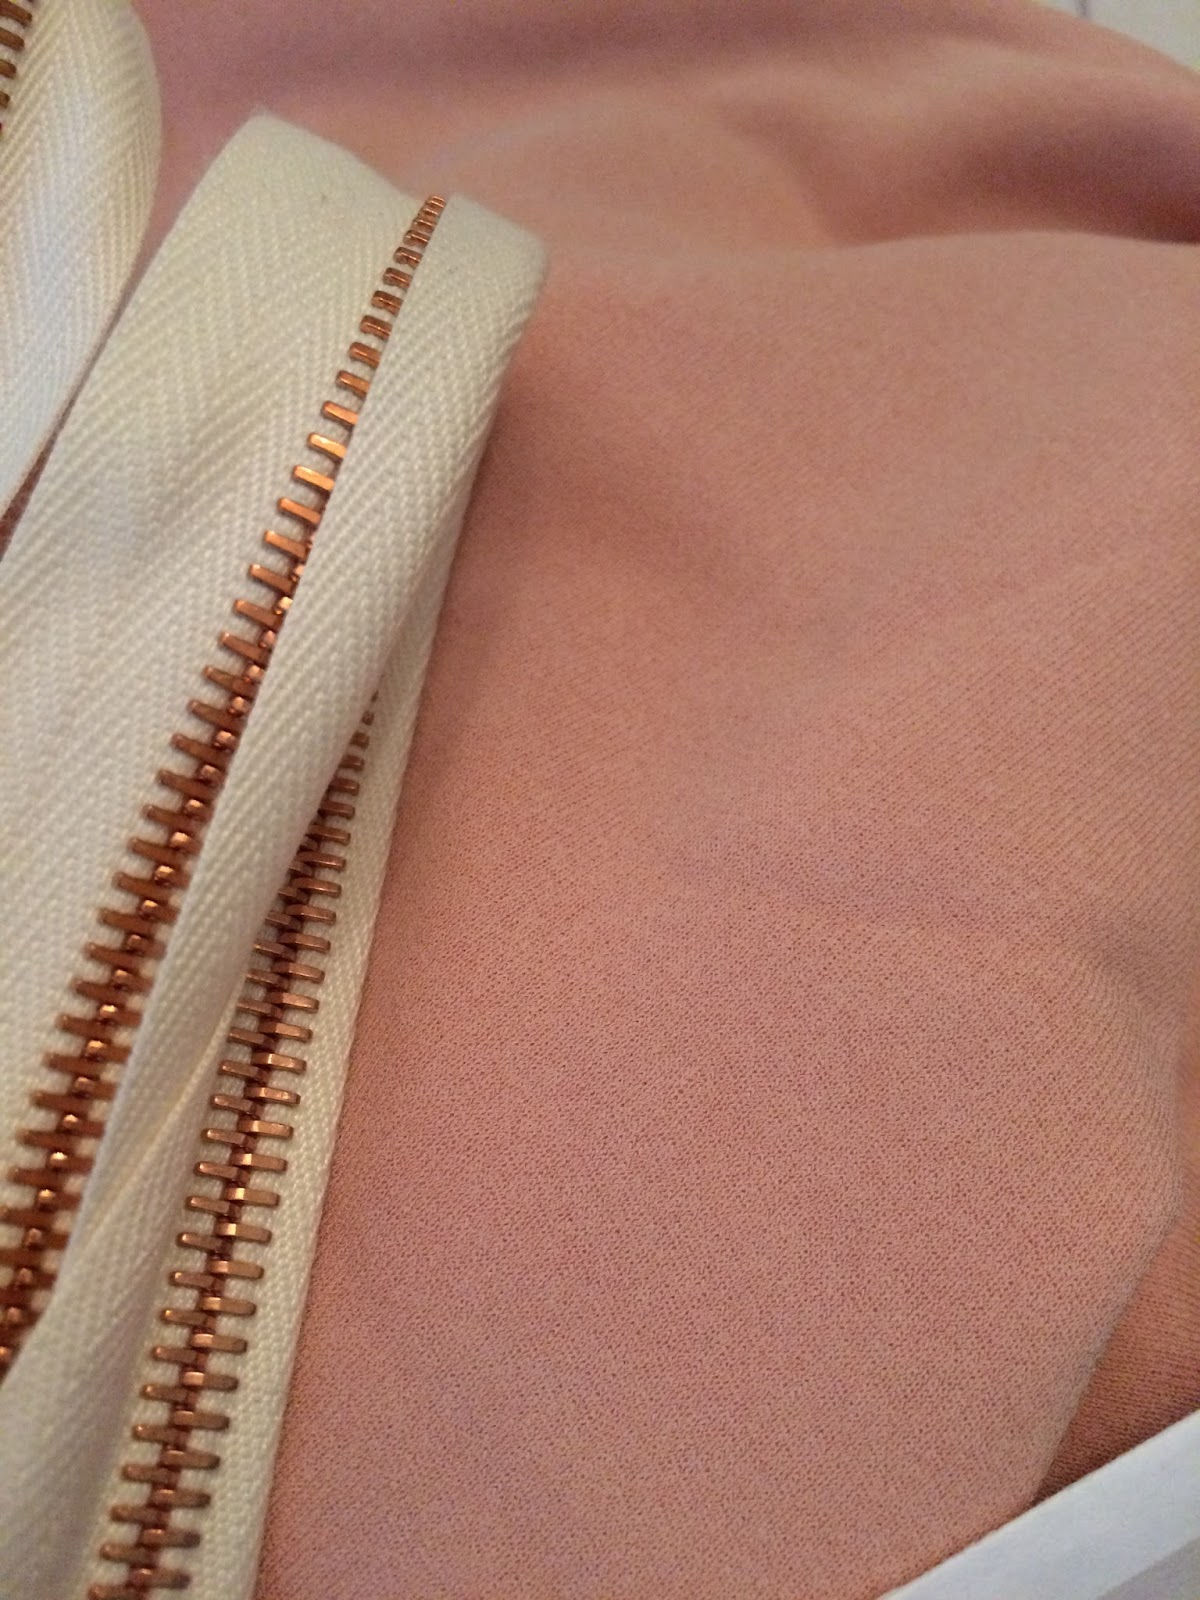
I used Riri zipper with copper teeth, size M6.

I thought my Riri zipper* with its copper teeth was the perfect pairing with the blush toned crepe viscose jersey I purchased from Gorgeous Fabrics. However I only had one yard and that was not enough so I used some leftover rayon jersey as contrast for the collar. 

*A note about Riri zipper. I used size M6 which is equivalent to 6mm. I compared that with the M4 and thought the latter was too small. However the M6 added some weight to the collar. 

This jersey was leftover from a previous project, Butterick 6241.


The warm mauve jersey was more lightweight than the main fabric so I interfaced with some fusible knit interfacing.

I also used the same interfacing to stabilize the shoulder seams.

The top itself was very easy to sew. The sleeves were sewn flat which is how I usually do it with knits. I decided to shorten the sleeves and forego the cuffs. 

However the collar part requires some careful sewing. 

Make sure the free end of the zipper tape is sewn well inside the seam. 


Otherwise this is what will happen! See that raw edge sticking out to the right side? 


After I corrected my mistake, this is what it looked like.

After topstitching.

After assembly.


The overlapping collars resulted in very thick seams. 

And I'm happy to say my Juki MO 654 DE serger sewed over the seams with no problem at all!

So I'm very happy with the collar! 

However I can't say the same for the rest of the top. I found the fit quite odd.

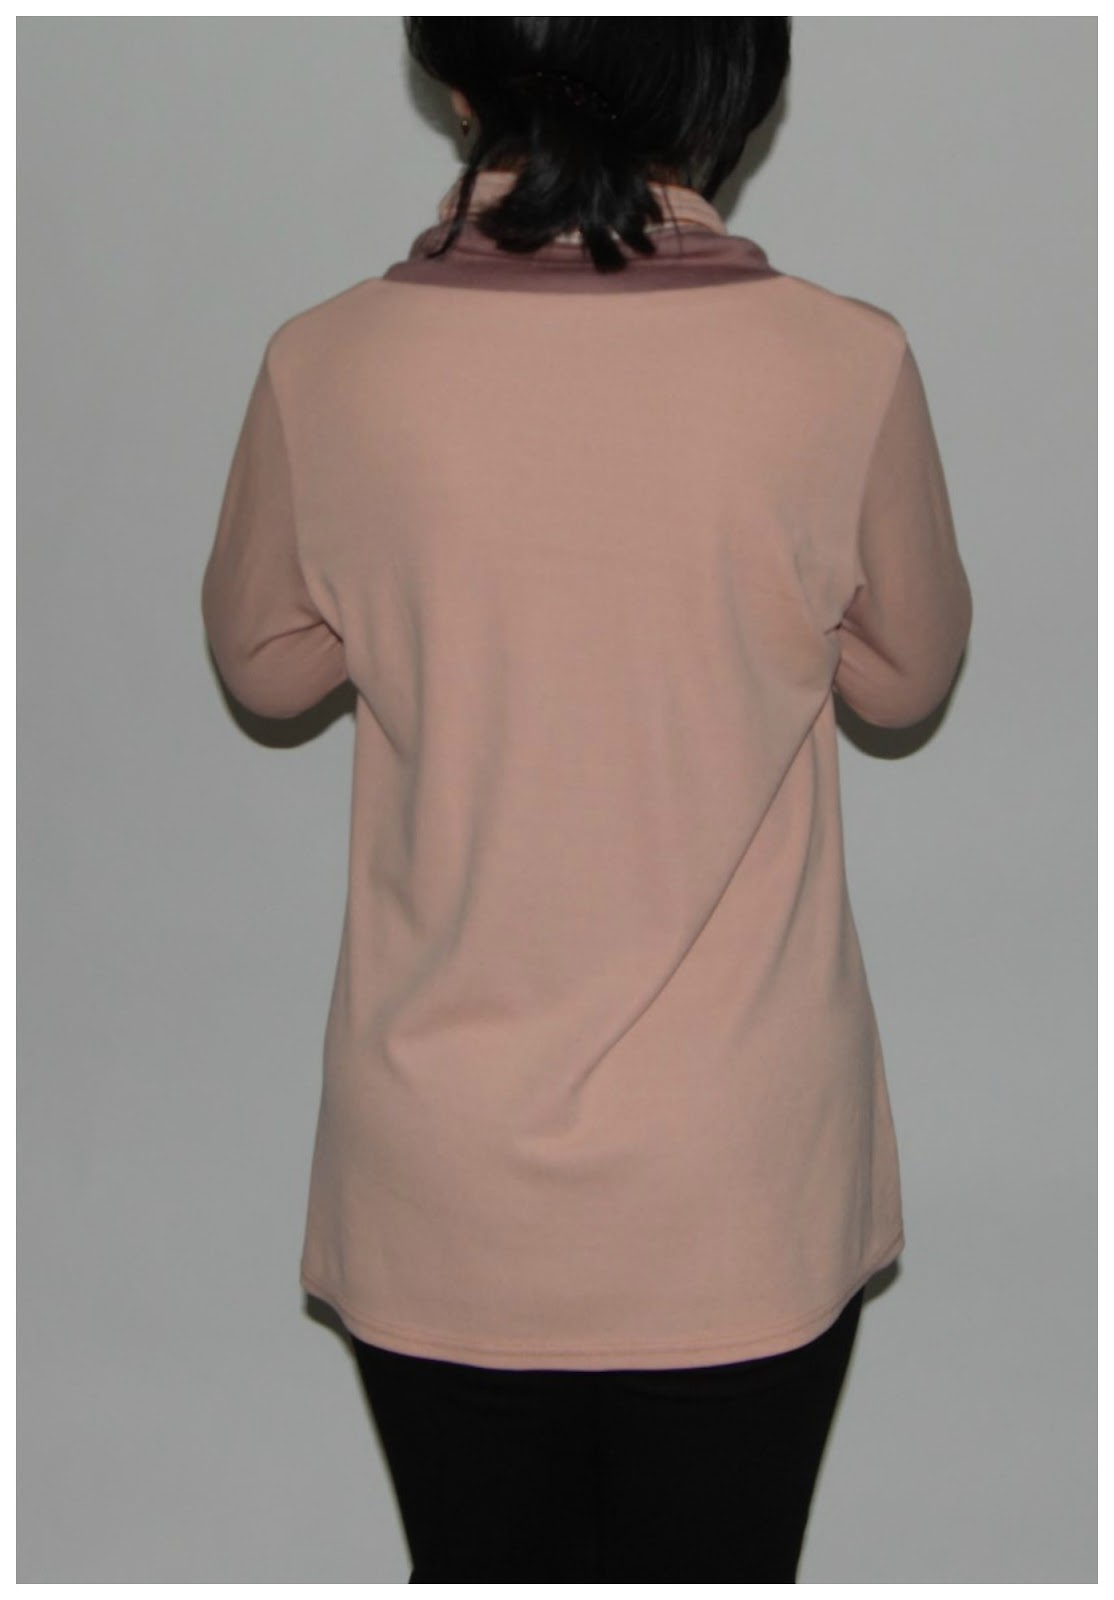
Although the fit looked like how it did in the pattern envelope, I found it weird in real life. 
The shoulders felt too wide and the sleeves were really really tight!
The overall fit was not that of a fitted pullover, more of a tunic style that was shapeless. I would have been happier if the bottom hem was drafted with some shape of sorts like a hi-lo style. As it is, it feels like the style could not decide if it wants to be a plain t-shirt or a tunic. I guess I have been spoiled by Jalie patterns. I should have expected this since the sizing was given in ranges (for ex. Size XS was 4-6, S 8-10, etc)

 With that said, I still wore the top the last weekend and I'll continue to wear it until I decide to deconstruct it and find a more suitable style. 


Monday, January 4, 2016

Blush Beret

As mentioned in this post I had some leftover scraps from the wool coating fabric I used to sew Vogue 9157.

All that was left of my coating fabric.

I searched online for free hat sewing patterns and decided to go with the one posted by Martha Stewart on her website. It was perfect for the scraps I had since the pattern did not require a large piece of fabric. The beret was created by sewing six small triangular pieces together and finished with a 2-inch wide band.


The template provided for head measurements ranging from 22" to 24".
I measured my head circumference and it was 22-7/8". I decided to use size 24 on the template as my fabric was quite thick and I figured it was easier to make it smaller if it ended a little too big.


I decided to leave the seams unfinished since the fabric did not ravel at all. But I made sure to iron the seams open before attaching the band.


For the band, I used my serger to trim and finish.


View of the band seam.

I attempted to make a button using the button covering kit but the wool was just too thick so I settled for the same button I used for the coat.

I love how it fits! It's not so snug so it won't mess up my hair too much;)


Blushing Through the Snow: Vogue 9157 Action Shots


This post is dedicated to modeling shots of the finished coat. I used Vogue 9157. Additional photos of the construction details can be seen in this post.

Worn with matching beret made from leftover wool.


Blushing Through the Snow: Anatomy of a Coat


Well, not really. Even though it has been officially winter, we still haven't seen snow in our neck of the woods. But it has definitely been cold for the past few days and I'm just glad I was able to finish this project in time for the season. 


I have this gorgeous, luxurious coating in my stash. It's a dusty rose-colored wool/nylon/cashmere blend from Mood Fabrics.
 I preshrunk it by steaming it with my iron. 

For lining, I used a blush colored stretch silk charmeuse also purchased from Mood.


I paired my fabric with Vogue 9157, a pattern for a lined double-breasted coat with two-piece raglan sleeves and collar band. Even though there were no pictures of the coat on a live model, I decided to take a risk and give it a try. The fact that it provided custom fit for A-D cups was a plus for me.  I made a muslin just to be sure. I used size 8 all throughout and found I only needed to work on the fit and shape of the sleeves. I had to shave off a few inches from the top of the sleeve and take in 5/8" from the back sleeve piece. 


For the facing and collar pieces that needed to be interfaced, I used Pro-Weft Supreme Light fusible interfacing purchased from Fashion Sewing Supply. I like that there is no need to pretreat it and it's ready to be used. 


The construction itself was really simple. One assembles the bodice sections first.

Then the lower sections.

The two sections were then sewn together. 


I had to make sure seams were aligned. 

I  also made sure to press seams open. Using tailor's ham made it easy to press around the curved edges.
The same steps were followed when it was time to assemble the lining.
This is my lining after it was sewn together. 


Layers of wool fabric created a thick seam. Fortunately, I now sew with a Juki F600 which was able to whiz through the thick layers with ease.

What was more challenging for me was creating a smoothly shaped collar. I used collar turning tool like this.


There was minimal hand sewing like this one when I had to slipstitch the small opening at the lower hem after bagging the lining.


T
These are my essential tools for hand stitching. I find that passing my thread through beeswax helps minimize tangles and knots.


Although not indicated in the instructions, I interfaced the sleeves around the hem area so I could sew the fabric edge to the interfacing itself thereby making the stitches invisible on the right side. 

I encountered a slight hiccup when it was time to sew the buttonholes. This was my first time to try the buttonhole stitch on my new machine. Testing on a sample fabric yielded the perfect results but when it was time to sew the actual one, the fabric kept getting stuck. The problem occurred while I was trying to sew the buttonhole located near the collar band. One side was too thick and the unevenness around the area made it impossible for the fabric to be fed forward. I was not ready to give up on my beloved Juki. I decided to try the clamping mechanism that came with the buttonhole foot. The manual specified it for sewing thin fabrics so I did not try it at first. 


\
The clamping mechanism on the buttonhole foot.

Lo and behold! Buttonhole stitches without a hitch.
View of the keyhole buttonhole from the wrong side.


I used 1" gold toned metal buttons purchased from Jo-Ann's. I used four for the front, two for inside the facing and two for the belt. I decided not to attach any buttons on the sleeves. I also anchored the main front buttons with smaller buttons on the wrong side.


All in all, this was such a fun project. I had a few pieces of scraps left and decided to make a matching beret, details of which are posted here. Meanwhile, please check out the coat in action here.